How to Preserve a Jigsaw Puzzle: Glue vs. Adhesive Sheets
Completing a jigsaw puzzle is a rewarding experience, often resulting in a beautiful, intricate design that’s worth saving. Whether it’s a 500-piece puzzle of a scenic landscape or a challenging 2000-piece masterpiece, preserving your work allows you to display it proudly or cherish it as a keepsake. While dismantling the puzzle and putting it back in the box is one option, many enthusiasts prefer to immortalize their accomplishment. If you’re wondering how to preserve a jigsaw puzzle, the two most popular methods are using puzzle glue and adhesive sheets. In this blog, we’ll take a detailed look at both methods, guiding you step by step on how to preserve your puzzle correctly. We’ll also weigh the pros and cons of each approach to help you choose the method that works best for your puzzle and personal preferences.

Why Preserve Your Jigsaw Puzzle?
Jigsaw puzzles are more than just a casual pastime; they often represent a significant emotional investment. The time, effort, and attention to detail required to complete a puzzle can make it feel like an artistic achievement. For many people, puzzles can also have sentimental value, especially if they depict favorite memories, custom designs, or were a gift from a loved one. Preserving your puzzle allows you to keep that memory alive and prevents it from getting damaged or lost.
In addition to sentimental reasons, preserving a puzzle has practical benefits. Without some form of preservation, a puzzle is vulnerable to a variety of environmental factors that can cause it to deteriorate. For instance, exposure to moisture or humidity can warp puzzle pieces, while dust and dirt can settle between the pieces, dulling the image. Additionally, handling or moving a completed puzzle without preservation can cause pieces to come loose or fall apart.
By preserving a puzzle, you not only safeguard it from damage but also give yourself the option to frame and display it like a piece of artwork. A preserved puzzle can become a beautiful addition to any room, turning what was once a fun hobby into a lasting form of decoration.
How to Use Puzzle Glue: Step-by-Step Guide
Using puzzle glue is one of the most common and effective ways to preserve a jigsaw puzzle. The glue works by sealing the puzzle pieces together, creating a solid, glossy surface that can be framed or displayed.
What Type of Puzzle Glue Should You Use?
Choosing the right type of puzzle glue is essential for ensuring that your puzzle is preserved properly. There are several types of puzzle glues available on the market, and it’s important to select one that is specifically designed for puzzles. These glues are usually water-based, non-toxic, and dry clear, leaving your puzzle with a professional-looking finish.
Liquid puzzle glue, which often comes in squeeze bottles or containers with built-in applicators, is the most commonly used type. It’s ideal for puzzles of all sizes because it spreads evenly over the surface and penetrates the cracks between pieces, ensuring that the entire puzzle is securely held together. You’ll also find spray-on puzzle glues, which are less common but can be convenient for larger puzzles as they offer an even application with minimal effort. However, it’s important to follow the manufacturer’s instructions closely, as spray glue can sometimes result in an uneven finish if not applied correctly.
Step 1: Prepare the Puzzle and Workspace
Before you begin applying glue, it’s crucial to prepare both your puzzle and your workspace. Start by placing the completed puzzle on a hard, flat surface, such as a tabletop or board. Be sure to put a protective layer, like wax paper or newspaper, underneath the puzzle to catch any excess glue that may seep through. This will prevent damage to your table or work surface. Make sure the puzzle itself is clean and free of any debris, dust, or pet hair. You’ll also want to ensure that all the pieces are lying flat and that there are no gaps or raised edges. If any pieces have come loose or aren’t fitting tightly together, gently press them into place before applying the glue.
Step 2: Apply the Glue Evenly
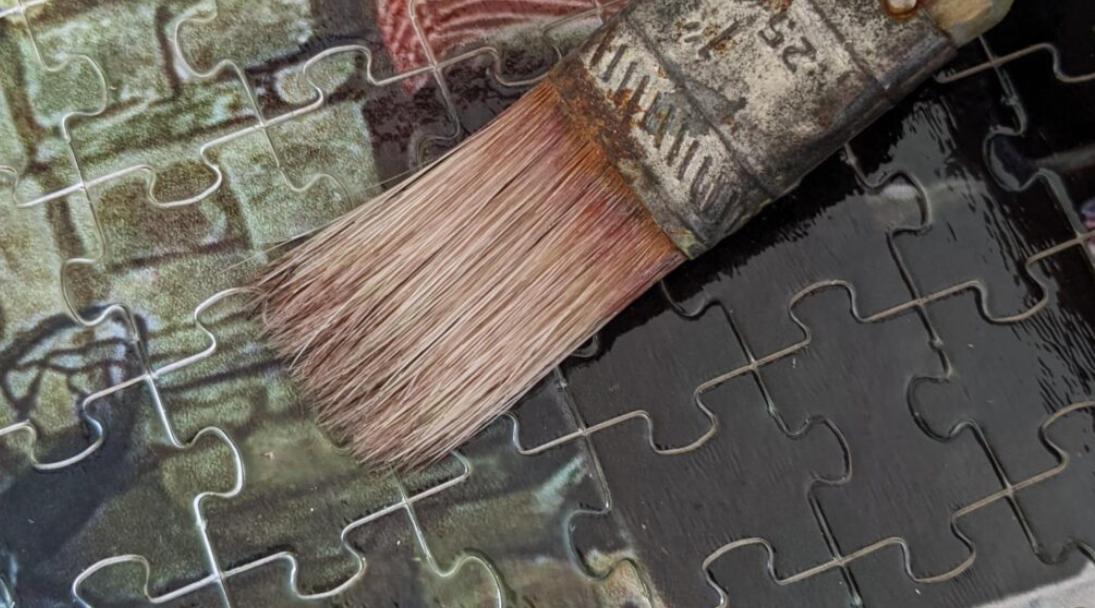
Once your puzzle is ready, it’s time to apply the glue. Start in the center of the puzzle and work your way outward, using a brush or applicator to spread the glue evenly across the surface. Be careful not to apply too much glue, as this can cause clumping or uneven drying. Instead, aim for a thin, even layer that covers the entire puzzle, including the edges and corners. If you’re using liquid glue, make sure to press the brush or applicator firmly but gently into the puzzle to ensure that the glue penetrates between the pieces. This will help bind the puzzle together and create a strong seal. If you’re using spray glue, apply it in light, even coats from a distance of about 6-8 inches, moving the can in a sweeping motion to cover the entire surface.
Step 3: Let the Puzzle Dry
After the glue has been applied, allow the puzzle to dry completely before moving or handling it. Depending on the type of glue and the room’s humidity, drying time can vary, but it’s typically recommended to let the puzzle dry for at least 3-4 hours. If possible, leave it overnight to ensure that it’s fully cured. Once the glue has dried, your puzzle will be sealed together in a single, solid piece with a glossy finish. You can now frame it, display it, or store it safely without worrying about the pieces coming apart.
How to Use Adhesive Sheets for Puzzle Preservation
If you prefer a mess-free alternative to glue, adhesive sheets are a great option. Adhesive sheets offer a simple and quick method for preserving puzzles, especially if you want to avoid the drying time and potential mess associated with glue.
Choosing the Right Adhesive Sheets
When selecting adhesive sheets, it’s important to choose ones that are specifically designed for jigsaw puzzles. These sheets typically come in various sizes to accommodate different puzzle dimensions, so make sure to measure your puzzle and buy sheets that fit. Some adhesive sheets are clear, allowing the back of the puzzle to be visible, while others are opaque, offering additional protection to the puzzle’s surface. Look for high-quality sheets with a strong adhesive backing to ensure that they’ll hold the puzzle together securely. Keep in mind that adhesive sheets are often more expensive than glue, but they provide a cleaner and quicker solution.
Step 1: Prepare and Align the Puzzle
As with puzzle glue, the first step is to ensure that your puzzle is ready for preservation. Lay the completed puzzle face-down on a clean, flat surface. Depending on the size of your puzzle, you may need to flip it carefully in sections. Once the puzzle is flipped, check to make sure that all the pieces are aligned correctly and that no gaps exist between them.
Step 2: Applying the Adhesive Sheets
Once the puzzle is prepared, it’s time to apply the adhesive sheets. Begin by peeling the backing off the first sheet and carefully placing it on the back of the puzzle, starting at one edge and smoothing it down as you go. Be sure to press firmly on the sheet to remove any air bubbles or wrinkles, as these can cause the puzzle to come apart over time. Continue applying additional sheets, overlapping them slightly to ensure full coverage of the puzzle. If your puzzle is large, you may need to use multiple sheets to cover the entire surface.
Step 3: Final Touches and Display
Once the adhesive sheets are applied, your puzzle is ready to be framed or displayed. If you notice any excess adhesive around the edges, trim it with scissors for a clean, polished finish. The adhesive sheets will hold the puzzle securely together without the need for drying time, allowing you to display your puzzle immediately.

Glue vs. Adhesive Sheets: Which Is Better?
Deciding between puzzle glue and adhesive sheets ultimately depends on your preferences and the puzzle you’re working with. Both methods offer their own advantages and drawbacks.
Puzzle Glue:
Adhesive Sheets:
For puzzles that you plan to frame or display prominently, puzzle glue might be the better option due to its solid and professional finish. On the other hand, if you’re looking for a quick and hassle-free solution, adhesive sheets provide an excellent alternative with minimal effort.
Conclusion
Preserving a jigsaw puzzle is a great way to showcase your hard work and creativity. Whether you choose to use glue or adhesive sheets, both methods can help protect your puzzle for years to come. Take into account the size and value of your puzzle, as well as your personal preferences, to select the preservation method that’s right for you. By understanding how to preserve a jigsaw puzzle, you ensure it remains a lasting display piece.
FAQ
How long does it take for puzzle glue to dry?
Puzzle glue generally takes anywhere from 3-4 hours to overnight, depending on the brand and the environmental conditions. For the best results, allow the puzzle to dry completely before handling it.
Can I frame a puzzle without using glue?
Yes! Adhesive sheets provide a great alternative to glue, allowing you to frame your puzzle without the mess or drying time. They hold the puzzle pieces securely and are easy to apply.
Will adhesive sheets damage the puzzle over time?
Adhesive sheets are designed to be safe for puzzles and shouldn’t cause any damage if applied properly. However, over long periods, the adhesive may weaken, so it’s important to periodically check the puzzle to ensure it’s still holding together securely.
